Download Movies App on Your PC
💻 Complete Setup Guide for Movies App on PC (Windows)
Looking to stream your favorite movies & TV shows on a larger display? 🎬 You can run the Movies app directly on your Windows computer using Android emulation software like BlueStacks, LDPlayer, or similar tools.
⚡ What You'll Need
- 🖥️ Windows PC or Laptop (Windows 10 or later)
- 🌐 Active internet connection
- 📥 Android Emulator (BlueStacks / LDPlayer / NoxPlayer)
🔹 Initial Setup Steps
- ⬇️ Download BlueStacks (most user-friendly option)
- ⚡ Alternative lightweight emulators: LDPlayer or NoxPlayer
- ✅ Set up and launch the emulator on your computer
📥 Installing BlueStacks on Windows – Beginner's Guide
Having trouble setting up BlueStacks? Don't worry 😊. This straightforward tutorial will walk you through the entire process without confusion. Follow each instruction carefully and you'll have the free movies app running on your PC in just a few minutes 🚀
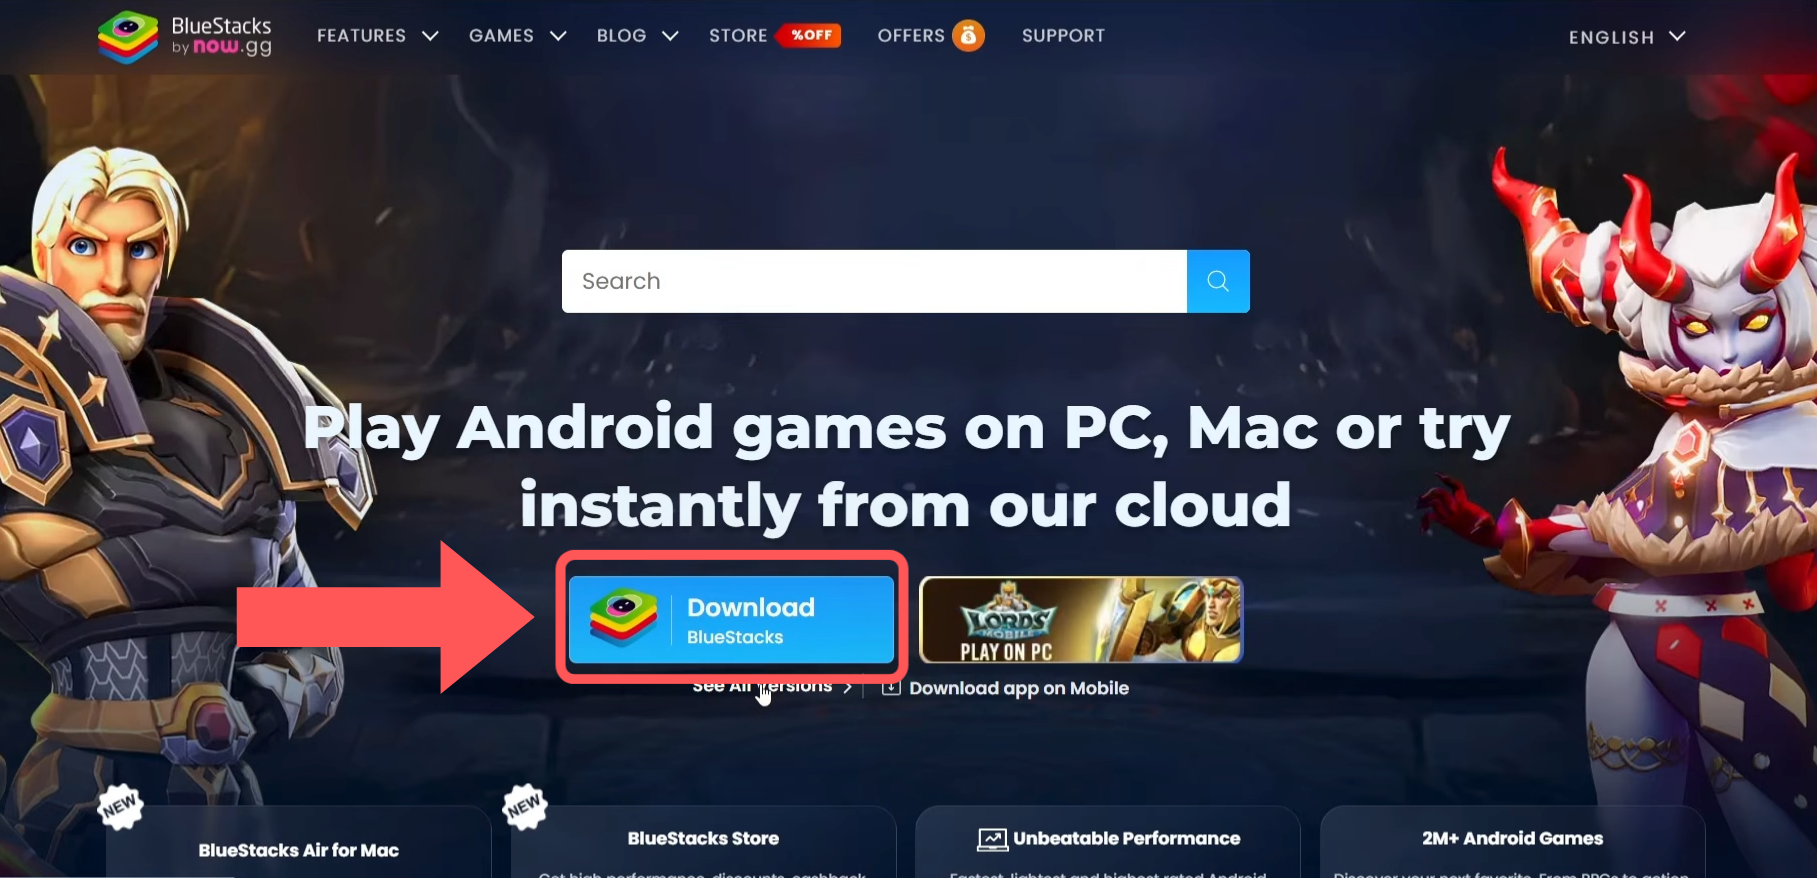
🔽 Step 1: Get BlueStacks
Begin by visiting the official BlueStacks site to download the installation file.
- ✔ Go to the official BlueStacks website
- ✔ Select the Download button (see highlighted area in the image)
- ✔ Let the file finish downloading to your device
📸 Reference image:
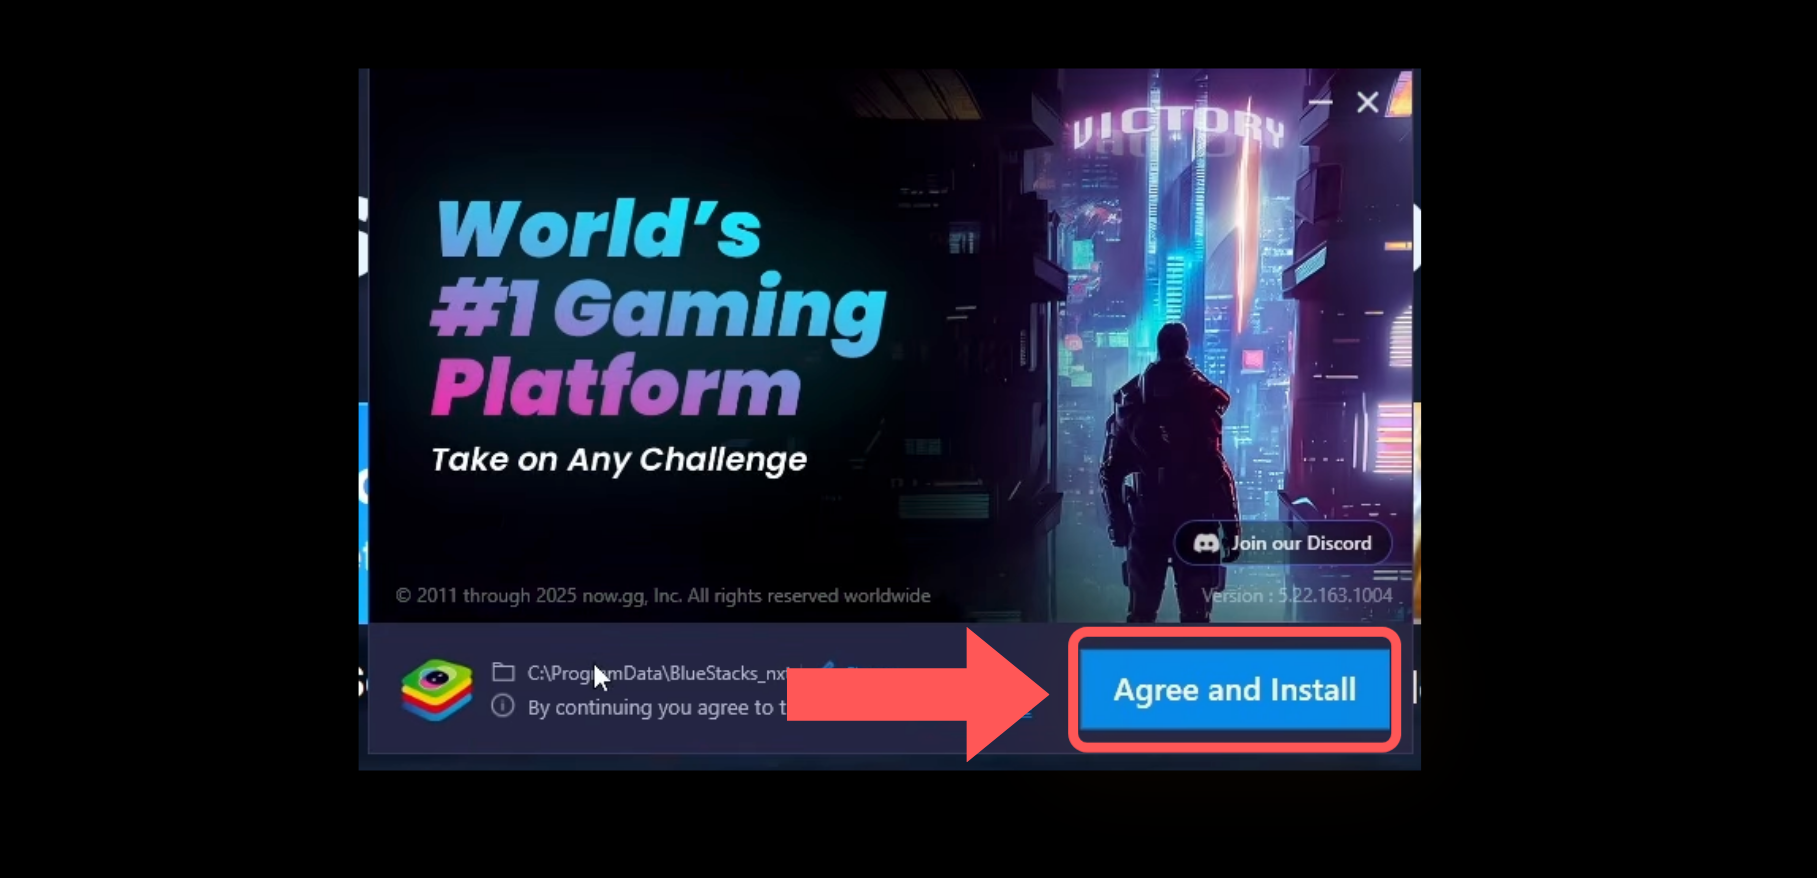
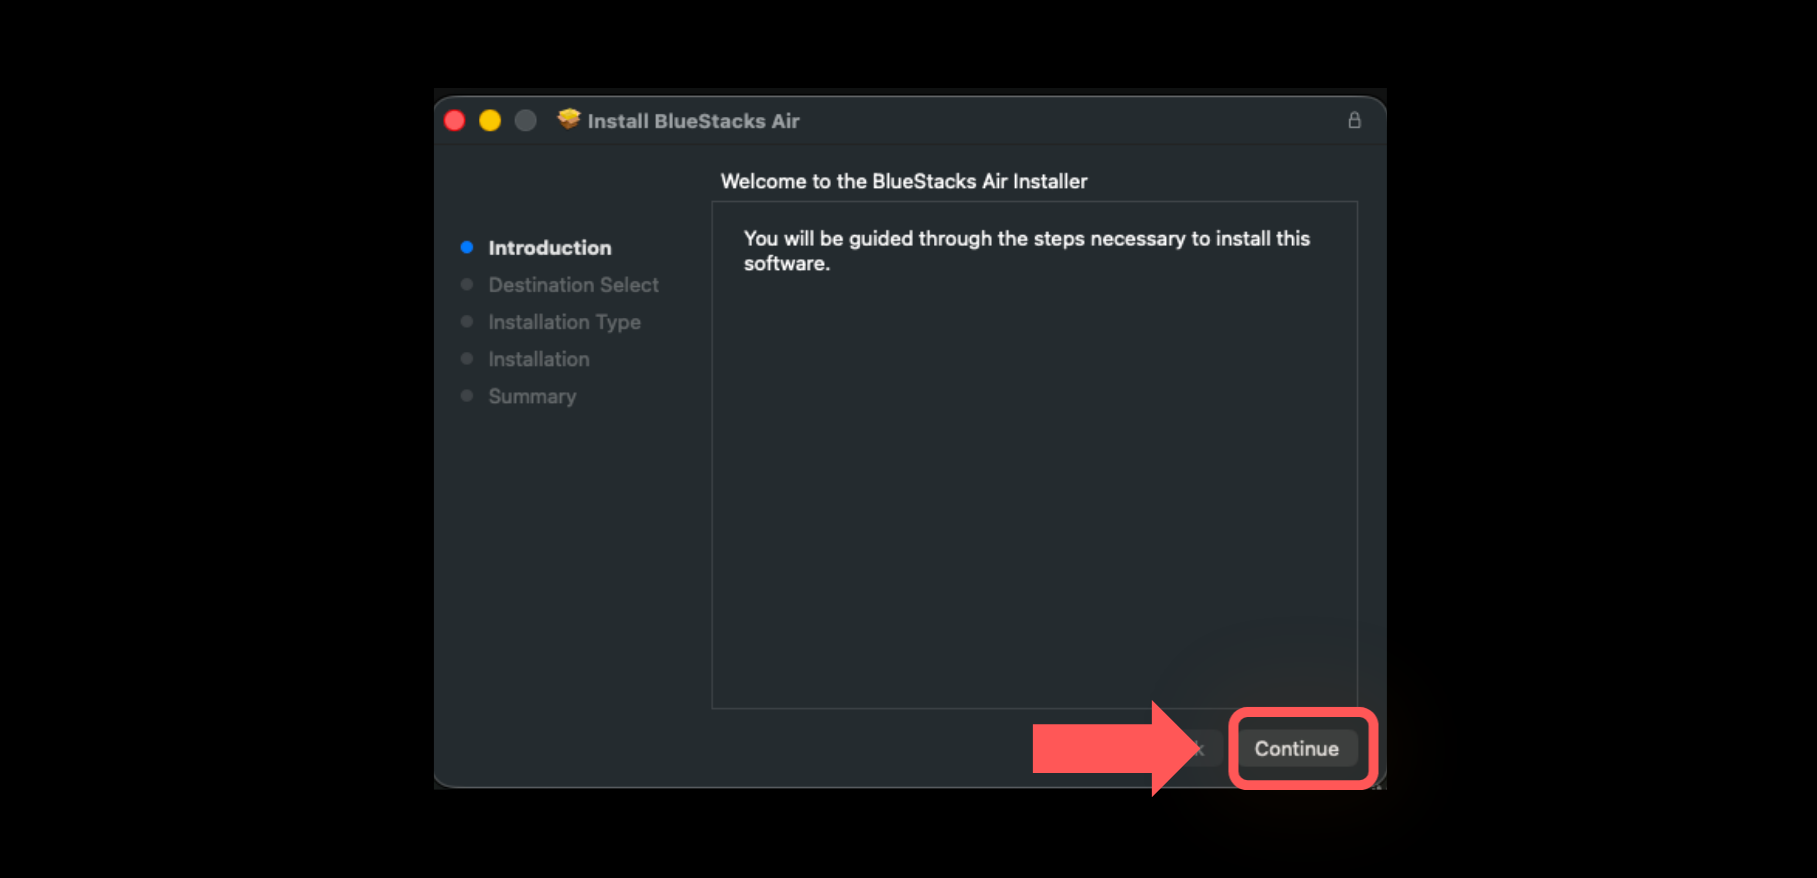
⚙️ Step 2: Launch the Installation File
After the download finishes, open it to begin the setup process.
- ✔ Double-click the file you just downloaded
- ✔ The BlueStacks setup wizard will appear
- ✔ Click the Install Now button (marked below)
📸 Installation window:
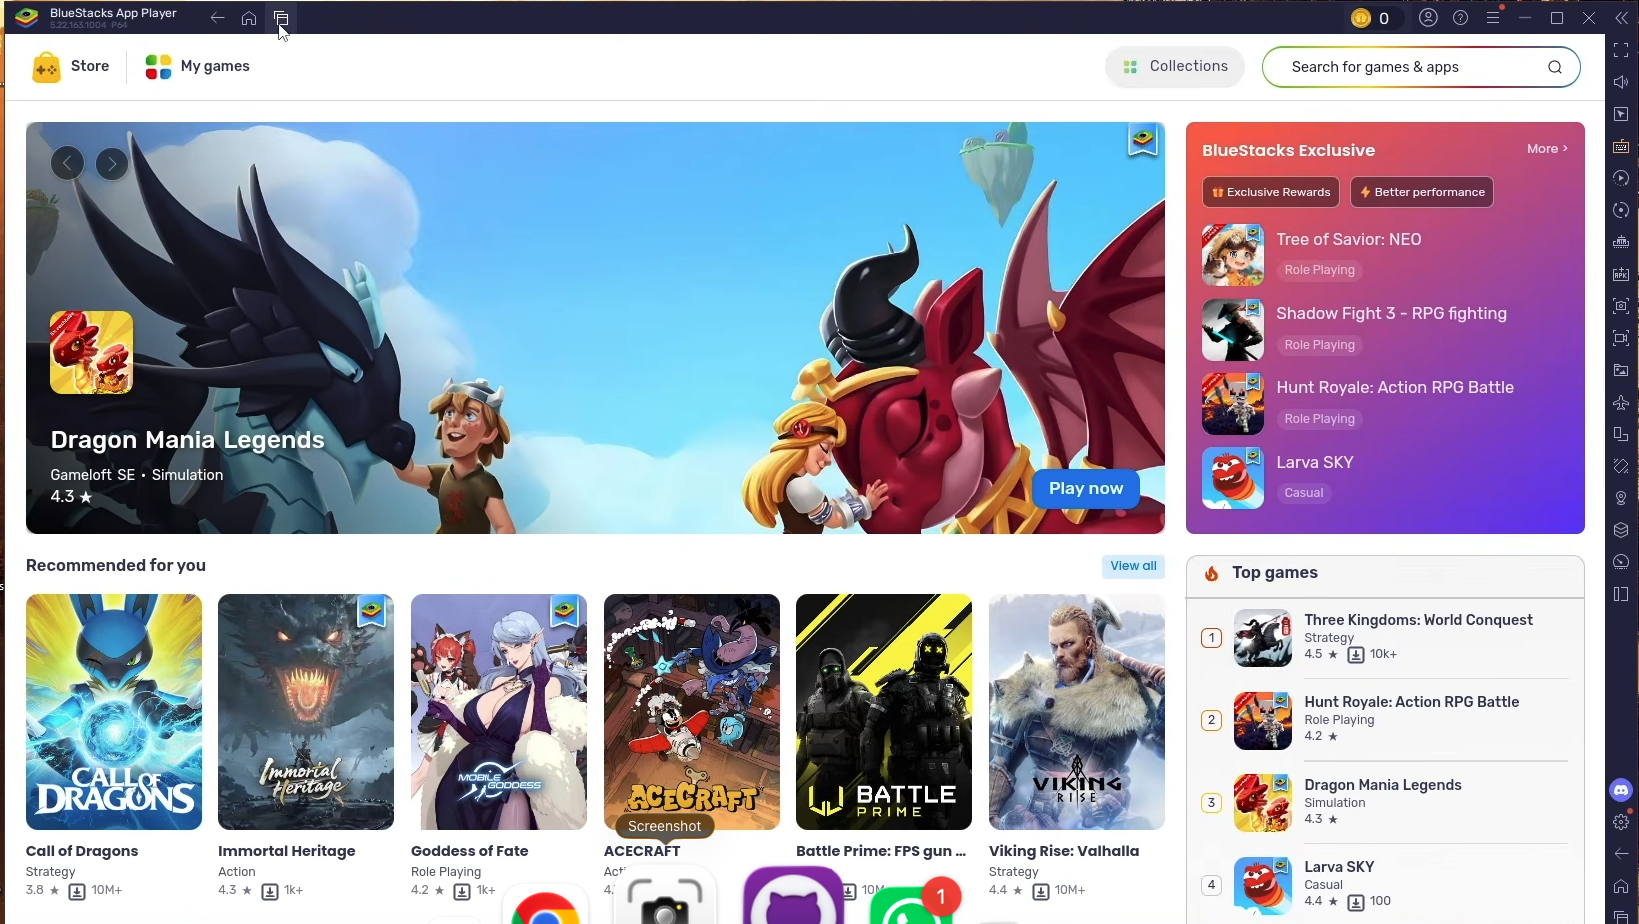
⏳ Step 3: Let Installation Complete
The setup process will take several minutes based on your computer's performance.
- ✔ Required files will download automatically
- ✔ The installation continues without your input
- ✔ BlueStacks will start automatically when ready
📸 BlueStacks interface after successful installation:
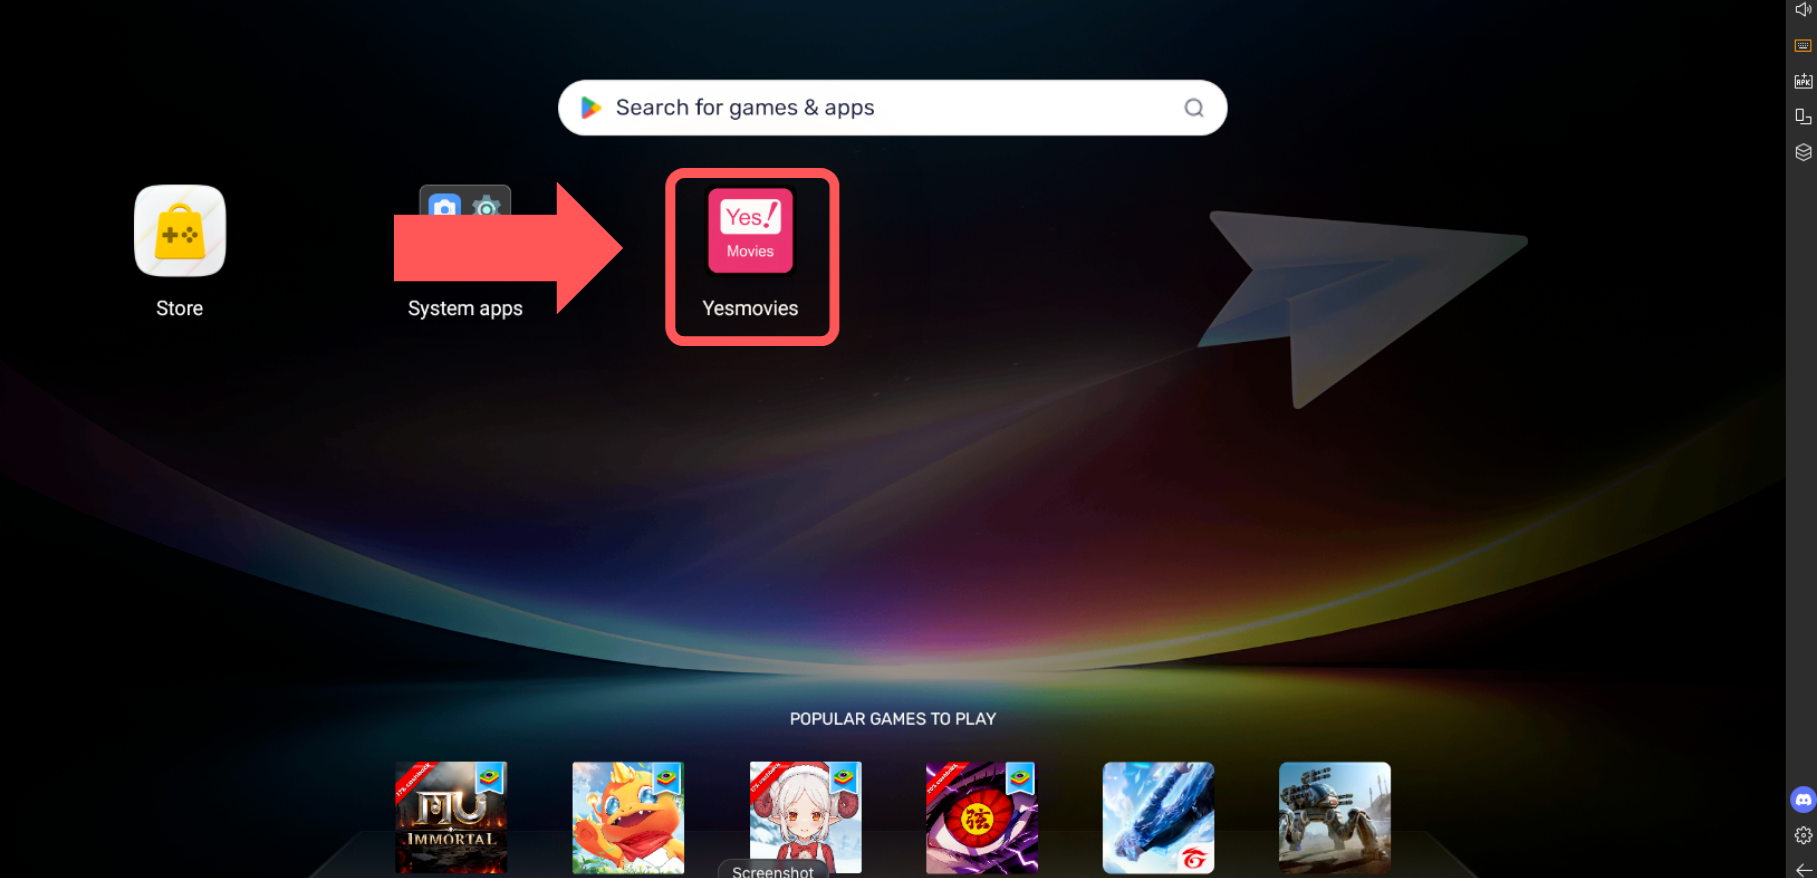
📲 Step 4: Add the Movies App APK
You're now prepared to install applications! 🎉
- ✔ Grab the movies app APK file using the link provided below
- ✔ Move the APK into BlueStacks using drag-and-drop functionality
- ✔ Installation happens automatically in the background
✅ Helpful Tips for Smooth Setup
- 💡 Maintain a reliable network connection throughout
- 💡 Turn on hardware acceleration or virtualization in your system settings
- 💡 Exit other running programs before installation starts
🎯 Complete! Your movies app is now available on your Windows PC, ready to stream entertainment 💻🎬
🎥 Video Installation Tutorial (Optional)
If you prefer watching a complete video walkthrough, check out the tutorial below 📺. Simply replace the VIDEO_ID with your preferred YouTube instruction link.
👉 Watch the steps carefully and complete BlueStacks setup smoothly with no complications 🚀
🍎🐧 Running Movies App on Mac & Linux (Simple Instructions)
Want to enjoy movies and shows on your MacBook or Linux machine? 🎬 The movies app works perfectly using Android emulators with an intuitive graphical interface.
⚡ Prerequisites for Getting Started
- 💻 Mac (Intel or Apple Silicon chip) or Linux desktop
- 🌐 Reliable internet access
- 📥 Android Emulator (BlueStacks, NoxPlayer, or equivalent)
- 📦 Current version of the movies app APK
🍎 Setting Up BlueStacks on macOS (Step-by-Step Instructions)
Want to get the movies app running on your Mac? Absolutely doable 😊. Installing BlueStacks on Mac is straightforward. Just follow the instructions below and you'll have the free movies app ready to stream your favorite content 🎬
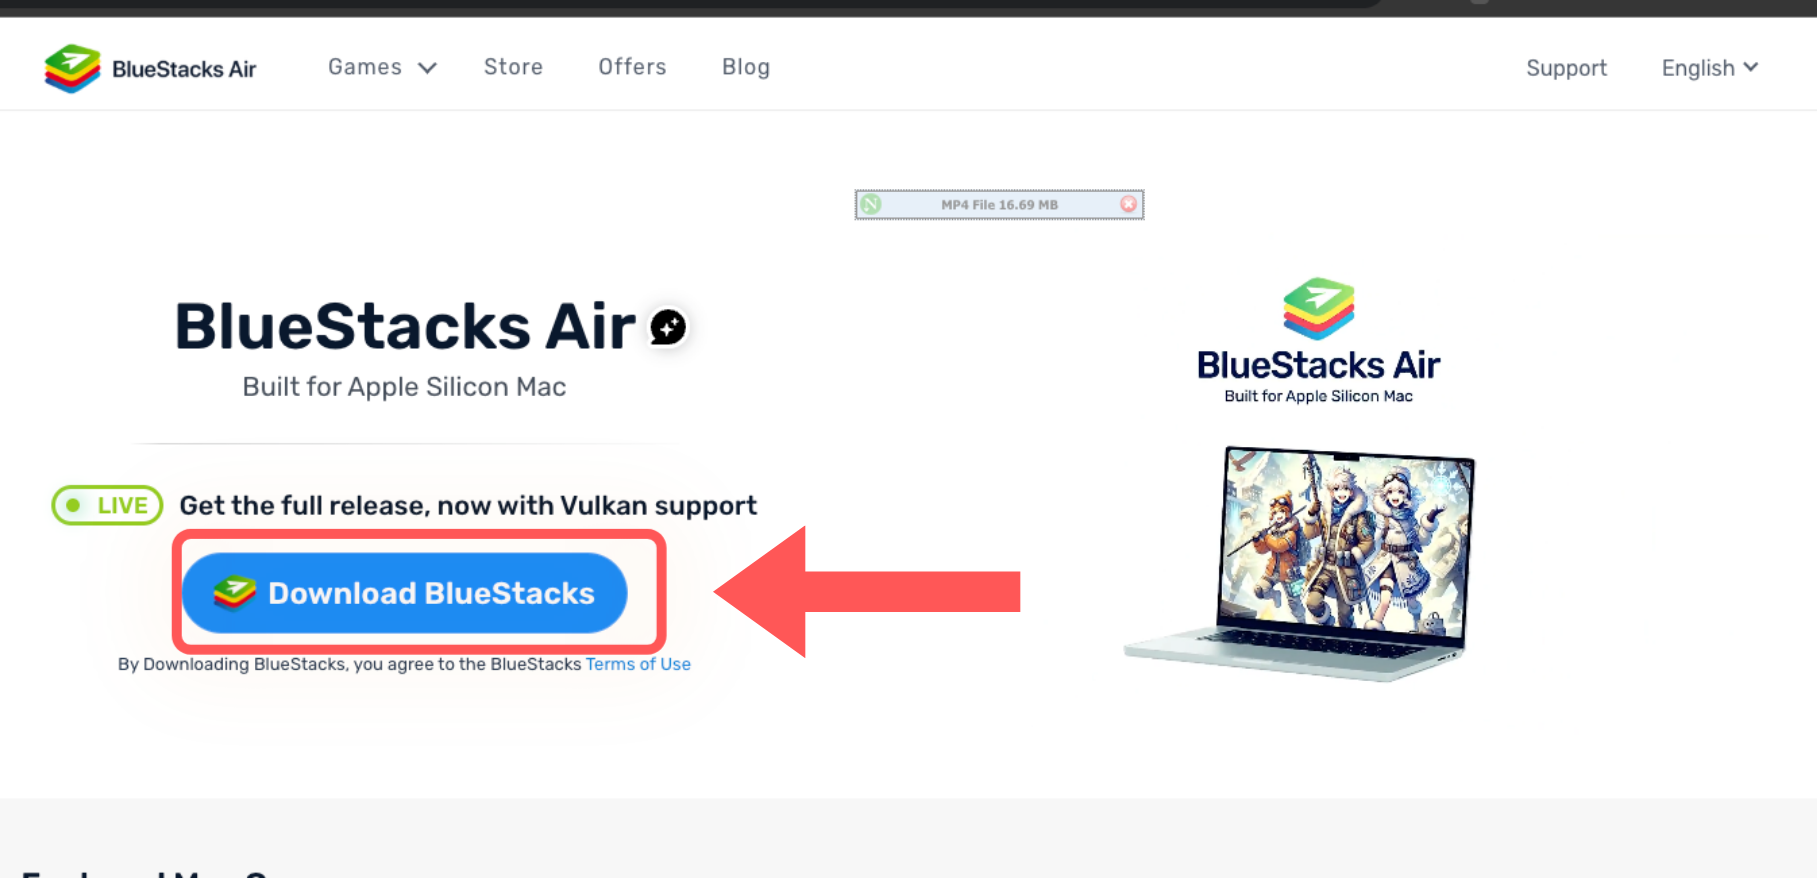
🔽 Step 1: Download BlueStacks for Mac
Start by getting the official .pkg file for your Mac system.
- ✔ Head to the official BlueStacks site
- ✔ Press the Download for Mac link
- ✔ The .pkg installer will begin downloading
📸 See the download option:
⚙️ Step 2: Open the Installer File
Once the file finishes downloading, open it to begin installation.
- ✔ Double-click the .pkg installer
- ✔ The setup window appears on your screen
- ✔ Select Continue → Install
- ✔ Type your Mac password when prompted 🔐
📸 Setup wizard screen:
⏳ Step 3: Finish the Installation
The setup will finish in several minutes.
- ✔ All components install in the background
- ✔ BlueStacks launches when the installation is finished
📲 Step 4: Install Movies App & Start Streaming
Everything is prepared for entertainment! 🎉
- ✔ Obtain the movies app APK using the connection below
- ✔ Place the APK file into BlueStacks with drag and drop
- ✔ The movies app installs immediately
- ✔ Open the app and begin watching your entertainment 📺
📸 BlueStacks dashboard after installation:
🎥 Prefer Video Instructions?
If you'd rather learn visually, watch this complete guide 📺 and follow the steps as they're shown.
👉 Insert your YouTube video ID instead of the default and follow along easily 🚀
✅ Mac Performance Tips
- 💡 Update macOS to the newest version available
- 💡 Stop running unnecessary background services for better speed
- 💡 Grant all necessary system permissions when the app requests them
🎯 All done! Your Mac now has the movies app and all the entertainment you need with BlueStacks 🍿💻
🎉 You're all set! The movies app is fully operational on your Mac or Linux computer.
💡 Tips for Better Performance
- ⚡ Turn off unnecessary applications to free up resources
- 🧠 Reserve adequate RAM allocation (minimum 2GB–4GB recommended)
- 🎮 Activate hardware acceleration or virtualization capabilities if your system supports it
❓ Solving Common Problems
- ❌ Emulator won't launch → Reinstall the software or try an alternative
- 🐢 Running slowly → Lower screen resolution or select a different emulator
- 🚫 APK fails to install → Verify the file integrity or grab the newest release